背景
最近项目中使用了@Async与@Scheduled自定义线程池注解实现定时任务,特此记录实现及其原理。
@Async
简介
@Async是Spring 3.0之后提供的注解,使用@Async注解可以轻松的实现异步调用。
官方文档: https://docs.spring.io/spring/docs/current/javadoc-api/org/springframework/scheduling/annotation/Async.html
异步原理
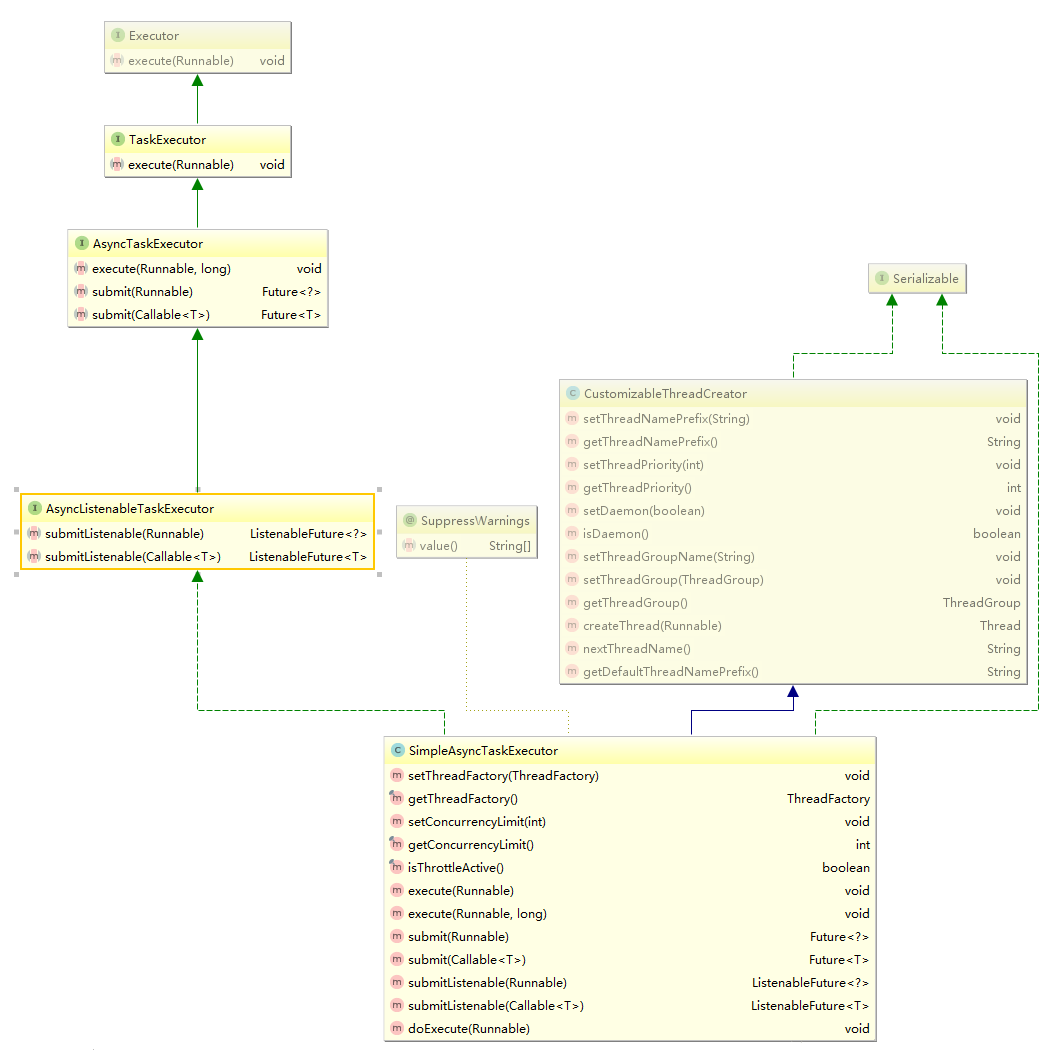
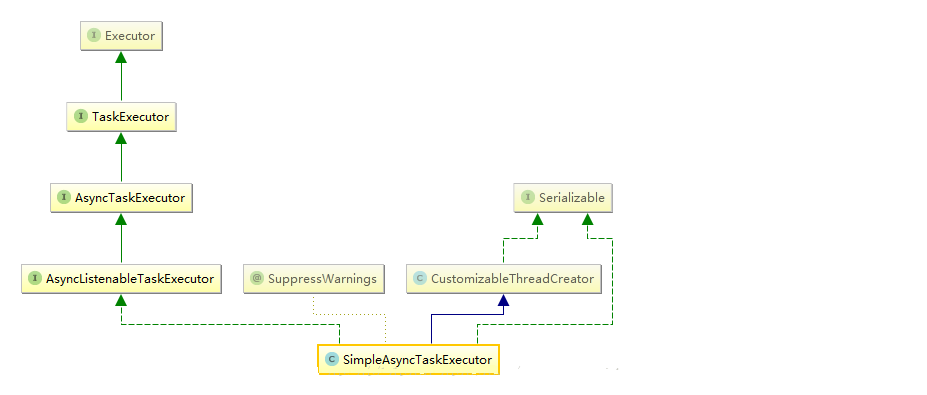
@Async在默认情况下使用的是SimpleAsyncTaskExecutor线程池,该线程池不是真正意义上的线程池。使用此线程池无法实现线程重用,每次调用都会新建一条线程。若系统中不断的创建线程,最终会导致系统占用内存过高,引发OutOfMemoryError错误
关系图


@Async配置默认线程池
- 要配置默认的线程池,要实现
AsyncConfigurer类的两个方法
- 不需要打印运行状况的可以使用ThreadPoolTaskExecutor类构建线程池
1
2
3
4
5
6
7
8
9
10
11
12
13
14
15
16
17
18
19
20
21
22
23
24
25
26
27
28
29
30
31
32
33
34
35
36
37
38
39
40
41
42
| @Slf4j
@EnableAsync
@Configuration
public class AsyncThreadConfig implements AsyncConfigurer {
@Override
public Executor getAsyncExecutor() {
int processors = Runtime.getRuntime().availableProcessors();
ThreadPoolTaskExecutor taskExecutor = new VisiableThreadPoolTaskExecutor();
taskExecutor.setCorePoolSize(1);
taskExecutor.setMaxPoolSize(2);
taskExecutor.setQueueCapacity(50);
taskExecutor.setThreadNamePrefix("default-ljw-");
taskExecutor.setRejectedExecutionHandler(new ThreadPoolExecutor.CallerRunsPolicy());
taskExecutor.initialize();
return taskExecutor;
}
@Override
public AsyncUncaughtExceptionHandler getAsyncUncaughtExceptionHandler() {
return (ex, method, params) ->
log.error("线程池执行任务发送未知错误,执行方法:{}", method.getName(), ex.getMessage());
}
}
|
使用:
1
2
3
4
5
6
7
8
9
10
11
|
@Async
public void updateData() {
long start = System.currentTimeMillis();
Thread.sleep(random.nextInt(1000));
long end = System.currentTimeMillis();
log.info("使用默认线程池,耗时:" + (end - start) + "毫秒");
}
|
@Async使用指定线程池
1
2
3
4
5
6
7
8
9
10
11
12
13
14
15
16
17
18
19
20
21
22
23
24
25
26
27
28
29
30
31
32
33
34
35
36
37
38
39
40
41
42
43
| @Configuration
public class AsyncThreadConfig implements AsyncConfigurer{
private static final Integer SIZE = 4;
private static final Integer QSIZE = 10;
private static final Integer SEC = 60;
@Bean
public Executor myAsync() {
ThreadPoolTaskExecutor executor = new ThreadPoolTaskExecutor();
executor.setMaxPoolSize(SIZE);
executor.setCorePoolSize(SIZE);
executor.setQueueCapacity(QSIZE);
executor.setThreadNamePrefix("async-thread-");
executor.setKeepAliveSeconds(SEC);
executor.setRejectedExecutionHandler(new ThreadPoolExecutor.DiscardOldestPolicy());
executor.initialize();
return executor;
}
}
|
使用:
1
2
3
4
5
6
7
8
9
10
|
@Async("myAsync")
public void updateData() {
long start = System.currentTimeMillis();
Thread.sleep(random.nextInt(1000));
long end = System.currentTimeMillis();
log.info("使用默认线程池,耗时:" + (end - start) + "毫秒");
}
|
@Scheduled
简介
Spring提供的用于定时任务的注解。
单线程原理
@Scheduled未指定线程池默认使用默认单线程(java自己实现的线程池newSingleThreadScheduledExecutor)去执行定时任务,当项目中定时器多起来,这是该线程如果执行别的定时任务阻塞,则会导致其余的定时任务执行时间间隔变长,未按指定延迟时间执行定时任务,可以使用@Async解决。
源码:
1
2
3
4
5
6
7
8
9
10
11
12
| private ScheduledExecutorService initScheduledExecutor(@Nullable ScheduledExecutorService scheduledExecutor) {
if (scheduledExecutor != null) {
this.scheduledExecutor = scheduledExecutor;
this.enterpriseConcurrentScheduler = (managedScheduledExecutorServiceClass != null &&
managedScheduledExecutorServiceClass.isInstance(scheduledExecutor));
}
else {
this.scheduledExecutor = Executors.newSingleThreadScheduledExecutor();
this.enterpriseConcurrentScheduler = false;
}
return this.scheduledExecutor;
}
|
@Scheduled使用
1
2
3
4
5
| @Async("myAsync")
@Scheduled(cron = "0 0/3 * * * ?")
public void updateData() {
dataService.updateData();
}
|
注:启动类需添加注解@EnableScheduling


This is copyright.